Ingredients
1 cup Nutella
1/2 cup sugar
1 cup all-purpose flour
1 egg
Directions
Preheat oven to 350F. Blend all ingredients together well. Form into 1" balls. Place on cookie sheet. Press down firmly with bottom of a glass. Bake 7-8 minutes or until set. Cool.
My Take
First off I didn't have all-purpose flour, so I knew the self-rising flour was going to make them fluffier than what the original picture showed. They didn't turn out too far from it. I should have not tried to use my beater to mix it though, that just made it crumbly so I ended up mixing it with my hands. Next time I'll use a fork or something else for sure. Other than that, I only had to bake them slightly longer than it originally called for. The last cookies of the batch are a tad bit grainy because that's when I was pressing the last little bits together and they weren't fully mixed, so they had some sugar that was in there, but the rest of the batch turned out just fine.
Wednesday, November 23, 2011
Thursday, November 17, 2011
No Bake Cheesecake
Ingredients
2 packages (20 sheets) graham crackers
11 tablespoons (1 3/8 sticks) unsalted butter, melted
2 tablespoons sugar
2 8-ounce packages cream cheese, room temperature
1 14-ounce can (1 1/4 cups) sweetened condensed milk
1/4 cup fresh lemon juice
1 teaspoon vanilla extract
Directions
Put graham crackers in a large resealable plastic bag, and crush them with a rolling pin until very fine crumbs form. Pour crumbs into a medium bowl; stir in sugar. Add butter, and stir until well combined. Press the crumb mixture into a 9-inch springform pan, spreading it 1 1/2 to 2 inches up the side; press flat. Chill crust in freezer at least 10 minutes. Meanwhile, make the filling: Using an electric mixer set at medium-high speed, beat the cream cheese in a large bowl until smooth. Beat in the condensed milk a little at a time, scraping the sides of the bowl as necessary. Beat in the lemon juice and vanilla. Pour the filling into the crust; smooth the top with a rubber spatula. Cover with plastic wrap, and refrigerate until firm, 2 1/2 to 3 hours. Unclasp sides of pan, and remove cheesecake.
My Take
So since I didn't get a chance to eat any of my last cheesecake and it's my favorite thing in the world (okay besides my dogs and photography), I decided to make another, just regular cheesecake. I found this recipe on Martha Stewart's website and since she's the queen of everything awesome I figured I couldn't go wrong. I don't have a springform pan thing, so I just used store bought crust and it worked just fine. I did find that I had extra of the filling and I didn't want to over flow it, so I just spread the left overs on some graham crackers and had that as a snack while I waited for the other one to set. YUM!!! I think I might make those for a party snack; have graham crackers with cheesecake spread on them and have little bowls full of toppings like caramel or cherry pie filling...om nom nom nom! Anywho, this cheesecake has more of a thick pudding consistency and I like those better than say a standard NY cheesecake, so I'm totally in love with it. I will definitely be making it again and trying different varieties of it. I think a strawberry cheesecake would be to die for!
Sunday, November 13, 2011
Frozen Peppermint Cheesecake...FAIL
Well I've officially had my first cooking fail...I did everything by the instructions, but there wasn't enough room in the freezer so we just put it in the fridge and nothing happened, so this recipe FOR SURE has to be frozen. I know, I know...that's what the instructions said, but if you've been reading you should all know by now that I don't follow instructions. So I'm going to take it home and put it in my freezer, cross my fingers and hope for the best lol.
UPDATE 11/14/11
My parents made room in their freezer for the little one and put it there for awhile and then tried it. They said that it was delicious, and it was more like peppermint ice cream. Now I'm really jealous because I totally want to try some of it made the right way!!!
Frozen Peppermint Cheesecake
Ingredients:
2 cups chocolate wafer cookie or sandwich cookie crumbs
1/4 cup sugar
1/4 cup butter, melted
1 (8 oz.) package cream cheese, softened
1 (14 oz.) can Eagle Brand® Sweetened Condensed Milk
2 teaspoons peppermint extract
2 cups heavy cream, whipped
Red food coloring (optional)
Smucker's® Chocolate Fudge Spoonable Ice Cream Topping (optional)
Directions:
My Take
I got to make this recipe at my dad's house since they've got all the utensils to do it. Carol thought she had peppermint extract and didn't so we just used vanilla instead and added extra pieces of the crushed peppermint candy to get the peppermint flavor. We also didn't make the crust like the recipe calls for, we just used the pre-made Oreo crust and we didn't put the ice cream topping on either. Currently it's sitting in the freezer setting...I don't want to wait, I want to try it out now!! lol. So besides having the cheesecake part everywhere, I had no idea that you could make whip cream with just one ingredient. Good thing Carol was there to tell me I had to whip it first because I would have just poured the heavy cream into the bowl and then it wouldn't have been so fluffy. Then she showed me how to fold it in and go from there. The only downfall is it became less pink after that, so I'd add more food coloring next time (I only added four drops today).
The other thing is this recipe makes WAY too much for just one cheesecake so we had to make another mini one. It probably would have made an second one, but we didn't have another Oreo crust.
2 cups chocolate wafer cookie or sandwich cookie crumbs
1/4 cup sugar
1/4 cup butter, melted
1 (8 oz.) package cream cheese, softened
1 (14 oz.) can Eagle Brand® Sweetened Condensed Milk
2 teaspoons peppermint extract
2 cups heavy cream, whipped
Red food coloring (optional)
Smucker's® Chocolate Fudge Spoonable Ice Cream Topping (optional)
Directions:
- LINE 9-inch round cake or springform pan with foil.
- COMBINE cookie crumbs and sugar in medium bowl. Add butter; mix well. Press 2 cups crumbs firmly onto bottom and partway up sides of prepared pan. Chill.
- BEAT cream cheese until fluffy in large bowl. Gradually add sweetened condensed milk until smooth. Stir in peppermint extract and food coloring, if desired; mix well. Fold in whipped cream. Pour filling into pan.
- COVER; freeze 6 hours or until firm. Garnish with fudge topping, if desired.
My Take
I got to make this recipe at my dad's house since they've got all the utensils to do it. Carol thought she had peppermint extract and didn't so we just used vanilla instead and added extra pieces of the crushed peppermint candy to get the peppermint flavor. We also didn't make the crust like the recipe calls for, we just used the pre-made Oreo crust and we didn't put the ice cream topping on either. Currently it's sitting in the freezer setting...I don't want to wait, I want to try it out now!! lol. So besides having the cheesecake part everywhere, I had no idea that you could make whip cream with just one ingredient. Good thing Carol was there to tell me I had to whip it first because I would have just poured the heavy cream into the bowl and then it wouldn't have been so fluffy. Then she showed me how to fold it in and go from there. The only downfall is it became less pink after that, so I'd add more food coloring next time (I only added four drops today).
The other thing is this recipe makes WAY too much for just one cheesecake so we had to make another mini one. It probably would have made an second one, but we didn't have another Oreo crust.
Saturday, November 12, 2011
Takes Two to Tango
Parmesan Roasted Potatoes
Ingredients:
4 medium potatoes, skins on, scrubbed and diced*
2-3 Tbsp olive oil
1/2c grated parmesan
1 tsp garlic salt
1/2 tsp paprika salt and pepper to taste
Directions:
In a large bowl, toss potatoes with olive oil, parmesan, garlic salt, and paprika. Spread potatoes out on a large baking sheet. Bake at 425 degrees 30-40 minutes, stirring potatoes every 10-15 minutes for even browning. Sprinkle with salt and pepper to taste and serve warm. *The most important thing is to keep the potato pieces about the same size so they cook evenly. I like to slice the potatoes in half lengthwise, then slice each half lengthwise again, then dice. I end up with 16-20 pieces per potato. You can end up with more or fewer, just try to keep the pieces the same size.
My Take:
Well, I think that I cut my potatoes too big, or they were just too big to begin with because mine looked nothing like the perfect potatoes in her picture, but regardless they were delicious. I think next time I will mix the ingredients together BEFORE I put the potatoes in to coat them. Also I'll cut smaller pieces of potatoes and probably not use as many either. The recipe says to use four, but I only did three potatoes and they weren't coated with a lot of seasoning. So I think two potatoes would be just fine for two people and then they'd be more flavorful. I still have a ton left over so I've got dinner for tonight too!
Sauteed Garlic Broccoli
Ingredients:
8 oz Package Broccolini (aka baby broccoli)
2 Tablespoons Butter
2 Garlic Cloves, minced finely Salt & Pepper, to taste
Directions:
In a fry pan, melt butter and add garlic. Wash broccolini thoroughly, then add to the fry pan and coat in butter mixture and saute for 10 minutes on medium high heat, then lower heat and cover for another 10 minutes.
My Take:
First off I bough fresh broccoli, I didn't use a package of broccolini like the recipe calls for. So I just cut up 2 stalks of it and used it all. After put the broccoli I realized I didn't have a lid for my pan, and I don't own a pan with a lid, so like everything else I try and cook I decided to wing it lol. I eventually had to add some more butter because it had all cooked in or evaporated and even then I ended up taking the broccoli off before it was fully cooked. It was REALLY crunchy and I would have liked it to be a tad softer, but all in all it wasn't bad. The original recipe calls it "Sauteed Parmesan Garlic Butter Broccoli" but there wasn't anything in it about the parmesan so I just left it out all together. I'm sure I could have just tossed some in and it would be just fine.
Rice Crispy Treats
Ingredients:
3 tablespoons butter
4 cups mini marshmallows
6 cups Rice Krispies
Directions:
In large saucepan melt butter over low heat. Add marshmallows and stir until completely melted. Remove from heat. Add Rice Krispies and stir until well coated. Using buttered spatula press mixture into 13 x 9 x 2-inch pan coated with cooking spray. Cool. Cut into 2-inch squares. Best if served the same day. Makes 12 to 15 squares.
My Take:
I'm starting to think I can't follow a recipe to save my life hahaha. I didn't want to buy mini marshmallows because I had the GIANT ones at home, so I just used those. But after everything was finished the treats were a tad tough and we determined that it was because it took SO long to cook the big ones down that they kind of toughened up. So stick to the recipe and use the mini ones. Also, I used the 13 x 9 pan and they're only like a 1/2" thick so I would use a smaller pan if possible too. Other than that they taste pretty good.
Ingredients:
4 medium potatoes, skins on, scrubbed and diced*
2-3 Tbsp olive oil
1/2c grated parmesan
1 tsp garlic salt
1/2 tsp paprika salt and pepper to taste
Directions:
In a large bowl, toss potatoes with olive oil, parmesan, garlic salt, and paprika. Spread potatoes out on a large baking sheet. Bake at 425 degrees 30-40 minutes, stirring potatoes every 10-15 minutes for even browning. Sprinkle with salt and pepper to taste and serve warm. *The most important thing is to keep the potato pieces about the same size so they cook evenly. I like to slice the potatoes in half lengthwise, then slice each half lengthwise again, then dice. I end up with 16-20 pieces per potato. You can end up with more or fewer, just try to keep the pieces the same size.
My Take:
Well, I think that I cut my potatoes too big, or they were just too big to begin with because mine looked nothing like the perfect potatoes in her picture, but regardless they were delicious. I think next time I will mix the ingredients together BEFORE I put the potatoes in to coat them. Also I'll cut smaller pieces of potatoes and probably not use as many either. The recipe says to use four, but I only did three potatoes and they weren't coated with a lot of seasoning. So I think two potatoes would be just fine for two people and then they'd be more flavorful. I still have a ton left over so I've got dinner for tonight too!
Sauteed Garlic Broccoli
Ingredients:
8 oz Package Broccolini (aka baby broccoli)
2 Tablespoons Butter
2 Garlic Cloves, minced finely Salt & Pepper, to taste
Directions:
In a fry pan, melt butter and add garlic. Wash broccolini thoroughly, then add to the fry pan and coat in butter mixture and saute for 10 minutes on medium high heat, then lower heat and cover for another 10 minutes.
My Take:
First off I bough fresh broccoli, I didn't use a package of broccolini like the recipe calls for. So I just cut up 2 stalks of it and used it all. After put the broccoli I realized I didn't have a lid for my pan, and I don't own a pan with a lid, so like everything else I try and cook I decided to wing it lol. I eventually had to add some more butter because it had all cooked in or evaporated and even then I ended up taking the broccoli off before it was fully cooked. It was REALLY crunchy and I would have liked it to be a tad softer, but all in all it wasn't bad. The original recipe calls it "Sauteed Parmesan Garlic Butter Broccoli" but there wasn't anything in it about the parmesan so I just left it out all together. I'm sure I could have just tossed some in and it would be just fine.
Rice Crispy Treats
Ingredients:
3 tablespoons butter
4 cups mini marshmallows
6 cups Rice Krispies
Directions:
In large saucepan melt butter over low heat. Add marshmallows and stir until completely melted. Remove from heat. Add Rice Krispies and stir until well coated. Using buttered spatula press mixture into 13 x 9 x 2-inch pan coated with cooking spray. Cool. Cut into 2-inch squares. Best if served the same day. Makes 12 to 15 squares.
My Take:
I'm starting to think I can't follow a recipe to save my life hahaha. I didn't want to buy mini marshmallows because I had the GIANT ones at home, so I just used those. But after everything was finished the treats were a tad tough and we determined that it was because it took SO long to cook the big ones down that they kind of toughened up. So stick to the recipe and use the mini ones. Also, I used the 13 x 9 pan and they're only like a 1/2" thick so I would use a smaller pan if possible too. Other than that they taste pretty good.
*The main course for the dinner was store bought pulled pork, all I had to do was heat it up in a microwave.
Monday, November 7, 2011
Pumpkin Seeds Take 2: Other Variations
Taco Pumpkin Seeds
1 cup seeds from freshly cut pumpkin, washed and dried
2 tablespoons vegetable oil
1 tablespoon taco seasoning mix
1/4 teaspoon garlic salt
In a skillet, saute pumpkin seeds in oil for 5 minutes or until lightly browned. Using a slotted spoon, transfer seeds to an ungreased 15-in. x 10-in. x 1-in. baking pan. Sprinkle with taco seasoning and garlic salt; stir to coat. Spread into a single layer. Bake at 325 degrees F for 15-20 minutes or until crisp. Remove to paper towels to cool completely. Store in an airtight container for up to 3 weeks.
Lawry's Seasoned Pumpkin Seeds
1 cup raw whole pumpkin seeds
2 teaspoons butter, melted
1/4 Lawry's Seasoned Salt
Preheat oven to 300 degrees F (150 degrees C). Toss seeds in a bowl with the melted butter and salt. Spread the seeds in a single layer on a baking sheet and bake for about 45 minutes or until golden brown; stir occasionally.
Parmesan Garlic Pumpkin Seeds
1 cup raw whole pumpkin seeds
2 teaspoons butter, melted
1/4 garlic salt
Parmesan cheese
Preheat oven to 300 degrees F (150 degrees C). Toss seeds in a bowl with the melted butter and salt. Spread the seeds in a single layer on a baking sheet, sprinkle with Parmesan cheese and bake for about 45 minutes or until golden brown; stir occasionally.
Sweet Pumpkin Seeds
2 cups raw whole pumpkin seeds
2 tablespoons butter, melted
1/2 cup white sugar, divided
1 tablespoon ground cinnamon, divided
- Remove all the pulp and strings from the pumpkin seeds, then wash and thoroughly dry the seeds.
- Preheat oven to 350 degrees F (175 degrees C). Line a baking sheet with parchment paper.
- Place the melted butter in a bowl, toss the seeds in the butter to coat, and pour them onto the prepared baking sheet. Sprinkle about 2 tablespoons of sugar and 1 teaspoon cinnamon over the seeds, stir the seeds around to mix the coating, and spread them into a single layer. Bake the seeds in the preheated oven for 5 minutes.
- Remove the seeds from the oven, and sprinkle them with another coating of 2 tablespoons sugar and 1 teaspoon cinnamon, mixing the seeds together and spreading them out as before. Bake 5 more minutes. Repeat the coating and baking step one more time, and bake the seeds for 5 more minutes.
- Sprinkle the seeds with the remaining 2 tablespoons of sugar, mix, and bake the sugar coating onto the seeds, about 10 more minutes. Let the seeds cool on the baking sheet before eating.
So I once again didn't really follow any of the directions and I just cooked them like I did the original butter garlic ones. Then I just left the different versions in for different amounts of time according to their recipe. For the taco ones, I didn't saute them before I put them in the oven like it says to do. I just mixed the vegetable oil, taco seasoning, and garlic salt all together then mixed that evenly over the seeds and popped them in the over. For the sweet pumpkin seeds, I mixed the butter (only 1 tbsp) with the seeds then sprinkled the cinnamon and sugar (1 tbsp sugar - 1/2 tsp cinnamon) over that and stirred; then placed them in the oven. I did take them out after 10 minutes and added another tablespoon of sugar and another half teaspoon of cinnamon and let that bake for about 20 minutes. Took them out and stirred them because they were stuck together and put them back in for another five minutes. Out of all of them I think the Lawry's and the cinnamon/sugar ones were my favorite.
Sunday, October 30, 2011
Deutscher Schokoladenbrauner Kuchen
Hallo!!
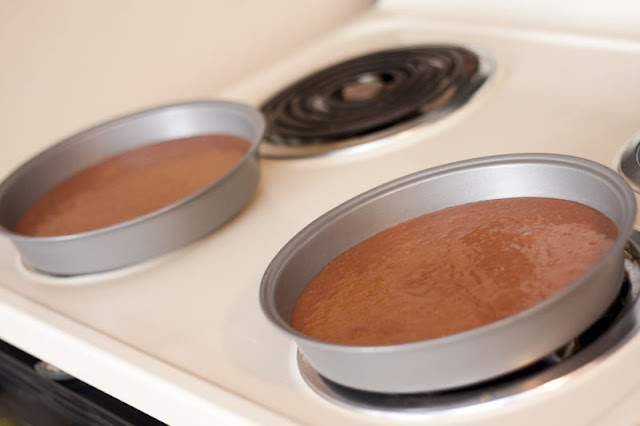
German chocolate cake!!! I had some eggs that I needed to use up and decided to try my hand at making a cake. My friend had left their cake pans here so I commandeered them! It was just a Betty Crocker box cake and frosting so I figured I couldn't mess it up too bad and set to work. I just followed the instructions on the box and waited for it to finish baking. What I didn't anticipate for is getting the cake out of the pan...I've never done that and had no idea how to do it without ruining the cake. So I just shook it a bit until the cake loosened itself and all was good in the world of cake again :) Also, what Betty Crocker doesn't tell you is how much frosting you need. I used two 9" cake pans and only bought one thing of frosting and that would have been fine if I didn't want to frost the sides of the cake, so I had to run to the store and buy a second can to finish the job. As far as I can tell everything turned out just fine, but I'll know tomorrow when I take it to my dad's house for the true taste test :)
Friday, October 28, 2011
Earth Worm Pie
2 Oreo Cookie pie crusts
5.9oz package chocolate pudding
Gummy worms
Take one of the pie crusts and crush it up, you can also do this with regular Oreo cookies, but i didn't want the temptation of a package of Oreos around :) Put a few gummy worms in the bottom of the other pie crust. Make the pudding according to the package then pour in pie crust with the gummy worms. Sprinkle the crumbled one on top of the pudding to make a top crust and then push a few worms into it to make it look like they're crawling around in dirt.
This was seriously one of the easiest things I've created!! I didn't follow a recipe, I just knew what it looked like and winged it. I ran into my friend Amy at the store suggested using two Oreo pie crusts and crumbling one rather than actual Oreos, which was probably better because I don't have a chopper and I think the filling would just make things weird. The crust is just the cookie part so it crumbles really easily and looks perfect!! I was stressing out about what to make for my friend's Halloween party, I wanted something festive, but not too gross looking at the same time so this was perfect! I'm really happy with how it came out and I had a little left over so I made a mini one that I could try after dinner so I knew how it would taste before tomorrow. It was tasty!! I adore gummy worms though so that might be why lol.
Wednesday, October 26, 2011
Pumped Up Pumpkin Seeds
1 1/2 cups raw whole pumpkin seeds
2 teaspoons butter, melted
1 pinch salt
Preheat oven to 300 degrees F (150 degrees C). Toss seeds in a bowl with the melted butter and salt. Spread the seeds in a single layer on a baking sheet and bake for about 45 minutes or until golden brown; stir occasionally.
Halloween is my absolute FAVORITE holiday (then Easter, then St. Patty's Day...weird I know) so I was really looking forward to carving pumpkins as I do every year. But since I moved out on my own seven years ago I haven't had roasted pumpkin seeds. My mom would make them every year while my sister and I carved our pumpkins, so I was determined to learn how to do it. After putting in the Google search I found out that it was like the easiest thing ever to make so I was pumped! Then I saw different reviews of recipes talking about using different spices other than just regular salt. There was cayenne pepper, Lowry's seasoned salt, cinnamon sugar...everything!! So I decided that butter garlic pumpkin seeds were the best thing since sliced bread and THAT is what I was going to make!!
In one of the reviews someone had said that it was best to let the seeds dry out over night rather than roasting them straight out of the pumpkin, so I spread them out on a cookie sheet (in a single layer) and left them there. I was really hopping for pumpkin seeds last night, but I am SO glad that I waited for them to dry...I'll talk about why later.
First off, I had 2 cups of pumpkin seeds so I upped the butter to 3 teaspoons and instead of a "pinch" of salt I added 1/4 teaspoon of garlic salt and melted them together in the microwave. Then I added the seeds to the butter garlic and mixed them all around until they were all covered in goodness. Once again I spread them out evenly on the cookie sheet (in a single layer) and popped them in the oven. Another one of the reviews said to mix them every ten minutes, I did about halfway through and that was it and they came out just fine. So going back to why you should let them dry overnight; the seeds roast up better and are extra crispy :) When my mom made them, they kind of had a bitter taste probably from being so fresh, but I think this way is a lot better. Sorry mom!! I have one more pumpkin left...I'm going to try taco pumpkin seeds next!!!
Tuesday, October 25, 2011
Miss Quesadilla Mae Hurt
1 package of 10" tortillas
2 precooked grilled chicken packages
2 cup package of Mexican style shredded cheese
24 oz. jar of salsa
1 packet of taco seasoning mix
The recipe: (10–15 minutes) Heat a frying pan on the stove. Combine chicken, cheese, salsa and a 1/4 of the taco seasoning in a bowl. Place one tortilla in the frying pan, add the mixture to half of the tortilla, fold over and cook until tortilla is browned and filling is warm. Flip to brown both sides.
*Optional* Serve with sour cream and jalapenos, or however preferred.
I don't like pretty much anything that's spicy so this is the recipe for quesadillas the way I like it, but if you like to sweat like a stuffed hog while you're eating feel free to add whatever spicy shenanigans you want. That's why it's called "Miss Quesadilla Mae Hurt." That and it's part of my derby name. Awhile back we were going to come up with a team cookbook and each of us had to contribute a recipe, this was mine.
Now the first time I made this it was very close to be a disaster. I decided that I was going to make a giant quesadilla (don't ask questions, I don't know what I was thinking, especially since I worked at Taco Bell for two years you'd think I'd know). Anyway I wanted a giant one and put one tortilla down, covered all of it with the inside mixture and then laid another tortilla on top. All was fine and dandy until it came time to flip the thing. I have enough trouble flipping the one that's folded in half let alone the giant one with no side to hold the stuff in. Needless-to-say all the chicken and melty cheese fell out because one tortilla folded over and then I had to wash the pan just to cook a new one. Epic fail. And like I said earlier, what the heck was I thinking?!
All is good now, I have perfected the art of quesadilla making. I've fed it to three friends, none of which have died or gotten ungodly sick so I think I'm good :) This can very easily be made into a vegetarian friendly by using mushrooms or refried beans.
Tuesday, October 11, 2011
Cake in a Cup
Ingredients
4 tablespoons self-rising flour
4 tablespoons sugar
1 egg
3 tablespoons cocoa powder
3 tablespoons Nutella
3 tablespoons milk
3 tablespoons vegetable oil
4 tablespoons self-rising flour
4 tablespoons sugar
1 egg
3 tablespoons cocoa powder
3 tablespoons Nutella
3 tablespoons milk
3 tablespoons vegetable oil
Whipped Cream Topping (if desired)
½ cup heavy cream
1 tablespoon sugar
½ cup heavy cream
1 tablespoon sugar
Directions
Combine all ingredients in a large coffee mug. Whisk well with a fork until smooth. Microwave on high for 1½– 3 minutes. (Time depends on microwave; mine took 1½ minutes.)
Add heavy cream to the bowl of a stand mixer fitted with a whisk attachment and whip on medium-high speed until almost stiff. Add sugar and beat until heavy cream forms stiff peaks. Top Mug Cakes with whipped cream and a little chocolate sauce, if desired.
The Cake in a Cup is probably one of the most ingenious inventions I've ever had the privileged of eating. It was so yummy and perfect to tame the I need cake right now! craving that comes on every now and then. Plus, I didn't have to buy an entire cake and then have the burden of not only eating it all, but also thinking about all the calories I just ate lol. So this is a great alternative.
Now because I'm full of all kinds of talent, I managed to get egg on my pants while trying to crack the stupid thing. Everything went off without a hitch other than that, but as you see, the directions say to cook it for 1½– 3 minutes, but my microwave must cook cold or whatever so I had to cook it for about 4 minutes. I took it out and was eating it the first time and got down to the bottom and it wasn't quite cooked all the way through, so I just popped it back in the microwave and finished. I think if I had known that it wasn't cooked all the way, the puff on the top wouldn't have fallen down (check out the pic). It probably would have been like a mushroom ballooning out of the top of the cup, but it's all good and everything tasted great and that's all that matters.
I also didn't make the whip cream to put on top, just because I thought it would be a little much to have at one setting between that and dinner. I didn't even finish the entire cake as it is, so I'm sure with that I would be exploding with food lol.
Mini Deep Dish Pizza
3-4 whole wheat wraps (try to find ones with at least 3 grams of fiber or more per wrap)
1 (15oz) can pizza sauce (you may have some left over, depending on how much sauce you like)
3/4 cup shredded mozzarella cheese
1/4 cup parmesan cheese
48 mini turkey pepperonis (or the 12 whole turkey pepperoni’s, each cut into 4 even pieces)
1 tsp basil/oregano mix OR Italian seasoning
1/2 tsp garlic powder
pinch of sweetener, (sugar/stevia/splenda)
pinch of black pepper
Weight Watchers Points Plus: 3pp for 2 Pizzas, and 5pp for 3 Pizzas
These were so quick and easy to make. I was done with the prep right as the oven was finished warming up. I didn't actually pay too much attention to the recipe since I didn't actually need to eat 12 of them. I only made three so I didn't mix the ingredients together or any thing like that. I just cut out the circles from the wraps, put in a tablespoon of pizza sauce in each one , sprinkled a little bit of each spice and parm, then put in three of the normal sized pepperoni (I didn't use turkey one's either), and put the cheese on top. Next time I'll probably use a little more pizza sauce and more mozzarella to fill them up a bit more, but other than that they were perfect. I also didn't spray the muffin pan because I don't have any spray, but I ended up not needing to either. I had to buy a muffin pan because I didn't have one of those either, but I bought the non-stick pan so I figured I was safe. Also, twelve minutes was a tad too long to cook mine. I checked them at ten minutes and they were a little on the dark side, but nothing that I couldn't handle. If I hadn't plan on making dessert as well tonight I probably would have made more than three pizzas for myself, but I wanted to have room to at least try both things. They were really yummy and SO easy to make. These are great for quick dinner, and between these and my Cake in a Cup, I am way full!! I actually think I'm going to make these tomorrow before I head out to go to school.
1 (15oz) can pizza sauce (you may have some left over, depending on how much sauce you like)
3/4 cup shredded mozzarella cheese
1/4 cup parmesan cheese
48 mini turkey pepperonis (or the 12 whole turkey pepperoni’s, each cut into 4 even pieces)
1 tsp basil/oregano mix OR Italian seasoning
1/2 tsp garlic powder
pinch of sweetener, (sugar/stevia/splenda)
pinch of black pepper
*Put your own spin on these by adding anything that you would normally like on a pizza just before popping them in the oven!
1. Preheat oven to 425 degrees. Spray a 12 count muffin tin with non-stick cooking spray.
2. Start by laying each tortilla out individually on a flat surface, and use an empty can, cup, or cookie cutter to cut 3-4 medium circles out of each wrap. I used the empty pizza sauce can, which worked well!3. Press each wrap circle into muffin tin using your fingers. Note: it doesn’t have to cover the entire side of the tin, it should just fit snuggly!
4. Meanwhile, pour pizza sauce into a medium sized bowl….Add in the parmesan cheese…And the spices. Stir until everything is well combined.
5. Drop about 1-2 tbs of sauce in each wrap, this really varies according to how much sauce you like!
6. Divide mozzarella cheese evenly over each mini pizza.
7. Place 4 mini pepperoni’s on top of each pizza.
8. Bake in preheated oven for 12-15 minutes, or until cheese is melted and lightly browned.
9. Wait for pizzas to cool, and remove from muffin tin using a fork or knife. Pizza’s should pop out with ease!
Calories: 66 Calories Per Pizza2. Start by laying each tortilla out individually on a flat surface, and use an empty can, cup, or cookie cutter to cut 3-4 medium circles out of each wrap. I used the empty pizza sauce can, which worked well!3. Press each wrap circle into muffin tin using your fingers. Note: it doesn’t have to cover the entire side of the tin, it should just fit snuggly!
4. Meanwhile, pour pizza sauce into a medium sized bowl….Add in the parmesan cheese…And the spices. Stir until everything is well combined.
5. Drop about 1-2 tbs of sauce in each wrap, this really varies according to how much sauce you like!
6. Divide mozzarella cheese evenly over each mini pizza.
7. Place 4 mini pepperoni’s on top of each pizza.
8. Bake in preheated oven for 12-15 minutes, or until cheese is melted and lightly browned.
9. Wait for pizzas to cool, and remove from muffin tin using a fork or knife. Pizza’s should pop out with ease!
Weight Watchers Points Plus: 3pp for 2 Pizzas, and 5pp for 3 Pizzas
Servings: 12 Mini Deep Dish Pizzas
These were so quick and easy to make. I was done with the prep right as the oven was finished warming up. I didn't actually pay too much attention to the recipe since I didn't actually need to eat 12 of them. I only made three so I didn't mix the ingredients together or any thing like that. I just cut out the circles from the wraps, put in a tablespoon of pizza sauce in each one , sprinkled a little bit of each spice and parm, then put in three of the normal sized pepperoni (I didn't use turkey one's either), and put the cheese on top. Next time I'll probably use a little more pizza sauce and more mozzarella to fill them up a bit more, but other than that they were perfect. I also didn't spray the muffin pan because I don't have any spray, but I ended up not needing to either. I had to buy a muffin pan because I didn't have one of those either, but I bought the non-stick pan so I figured I was safe. Also, twelve minutes was a tad too long to cook mine. I checked them at ten minutes and they were a little on the dark side, but nothing that I couldn't handle. If I hadn't plan on making dessert as well tonight I probably would have made more than three pizzas for myself, but I wanted to have room to at least try both things. They were really yummy and SO easy to make. These are great for quick dinner, and between these and my Cake in a Cup, I am way full!! I actually think I'm going to make these tomorrow before I head out to go to school.
Sunday, October 9, 2011
VoilĂ !
I am honestly impressed because it turned out really well. I didn't know how much I'd like it because of all the beans, I'm not that big of a fan of them, but it was tasty. I never thought that chili without meat would be so yummy. Just goes to show that you've got to try something new sometimes.
I really don't think I'd do anything different the next time. I did notice after the last post it said to "season to taste" and I just added all the seasons at the full amount the recipe called for, but it was delicious anyway, so it worked out. I will definitely be making this again during the winter!
Hopefully you'll try this chili!
~The Terrible House Wife
Saturday, October 8, 2011
Me vs. Onions: Round 1
1 (19 ounce) can black bean soup
1 (15 ounce) can kidney beans, rinsed and drained
1 (15 ounce) can garbanzo beans, rinsed and drained
1 (16 ounce) can vegetarian baked beans
1 (14.5 ounce) can chopped tomatoes in puree
1 (15 ounce) can whole kernel corn, drained
1 onion, chopped
1 green bell pepper, chopped
2 stalks celery, chopped
2 cloves garlic, chopped
1 tablespoon chili powder, or to taste
1 tablespoon dried parsley
1 tablespoon dried oregano
1 tablespoon dried basil
Directions
In a slow cooker, combine black bean soup, kidney beans, garbanzo beans, baked beans, tomatoes, corn, onion, bell pepper and celery. Season with garlic, chili powder, parsley, oregano, and basil. Cook for at least two hours on High.
Let me just say that I am NEVER chopping onions again!!! End of story. It took me f-o-r-e-v-e-r to finish chopping because my eyes burned SO bad. How do people do that? How do chefs do that on a daily basis?! Them people are nuts. There's got to be a trick to it, but I sure don't know it! It's been like 3 hours and my eyes are still sensitive. >.<
I was a little nervous that my Crock Pot wouldn't be big enough because I don't know the size of it and the recipe says it's for 8 servings. I was going to cut it in half, but I didn't know what I was going to do with the half cans of food, so I just crossed my fingers and threw it all in. Thankfully it all fit.
I'm also not cooking it on High because it's for tomorrow's dinner, so I have it on Low. I don't really know how long I should let it cook though...I thought about shutting it off and putting it in the fridge for the night, but I don't really know. Guess I'll wing it lol.
Subscribe to:
Posts (Atom)