Showing posts with label Dessert. Show all posts

Friday, May 31, 2013

Memorial Day Cheesecake

Ingredients 
1 pre-made graham cracker crust
2 8-ounce packages cream cheese, room temperature
1 14-ounce can (1 1/4 cups) sweetened condensed milk
1/4 cup fresh lemon juice
1 teaspoon vanilla extract

Directions 
To make the filling: Using an electric mixer set at medium-high speed, beat the cream cheese in a large bowl until smooth. Beat in the condensed milk a little at a time, scraping the sides of the bowl as necessary. Beat in the lemon juice and vanilla. Separate the cheesecake mix into three equal parts. Use red and blue food coloring to color to your liking (could use different colors for a variety of different holidays or occasions). Pour the filling into the crust; smooth the top with a rubber spatula. Cover with plastic wrap, and refrigerate until firm, 2 1/2 to 3 hours.


My Take
I know I haven't posted in a bajillion years, but I'm truly living up to my name as a terrible housewife because I've tried absolutely zero new recipes. But since I had to work this year on Memorial Day, I wanted to do something special for my co-workers and decided to do a spin off on the No-Bake Cheesecake recipe. Once again I altered the recipe and instead of using a full pie crust I bought individual pie crusts (found them at WalMart, Kroger didn't have them). And I still had enough left over for a full size cheesecake for me! The other thing I added was some cheery pie filling on the top of it. At first I didn't know if it would turn out the way I wanted it to, so when it did I was so excited. The goal was to layer red, white, and blue cheesecake so when you cut into it there'd be the three colors. I think the red layer needed a few more drops of red because it was more of a pink, but it was a HUGE hit with my co-workers so that's really all that mattered.


Wednesday, November 23, 2011

Nutella Cookies

Ingredients
1 cup Nutella
1/2 cup sugar
1 cup all-purpose flour
1 egg

Directions
Preheat oven to 350F. Blend all ingredients together well. Form into 1" balls. Place on cookie sheet. Press down firmly with bottom of a glass. Bake 7-8 minutes or until set. Cool.

My Take
First off I didn't have all-purpose flour, so I knew the self-rising flour was going to make them fluffier than what the original picture showed. They didn't turn out too far from it. I should have not tried to use my beater to mix it though, that just made it crumbly so I ended up mixing it with my hands. Next time I'll use a fork or something else for sure. Other than that, I only had to bake them slightly longer than it originally called for. The last cookies of the batch are a tad bit grainy because that's when I was pressing the last little bits together and they weren't fully mixed, so they had some sugar that was in there, but the rest of the batch turned out just fine.


Thursday, November 17, 2011

No Bake Cheesecake


Ingredients
2 packages (20 sheets) graham crackers
11 tablespoons (1 3/8 sticks) unsalted butter, melted
2 tablespoons sugar
2 8-ounce packages cream cheese, room temperature
1 14-ounce can (1 1/4 cups) sweetened condensed milk
1/4 cup fresh lemon juice
1 teaspoon vanilla extract

Directions
Put graham crackers in a large resealable plastic bag, and crush them with a rolling pin until very fine crumbs form. Pour crumbs into a medium bowl; stir in sugar. Add butter, and stir until well combined. Press the crumb mixture into a 9-inch springform pan, spreading it 1 1/2 to 2 inches up the side; press flat. Chill crust in freezer at least 10 minutes. Meanwhile, make the filling: Using an electric mixer set at medium-high speed, beat the cream cheese in a large bowl until smooth. Beat in the condensed milk a little at a time, scraping the sides of the bowl as necessary. Beat in the lemon juice and vanilla. Pour the filling into the crust; smooth the top with a rubber spatula. Cover with plastic wrap, and refrigerate until firm, 2 1/2 to 3 hours. Unclasp sides of pan, and remove cheesecake.

My Take
So since I didn't get a chance to eat any of my last cheesecake and it's my favorite thing in the world (okay besides my dogs and photography), I decided to make another, just regular cheesecake. I found this recipe on Martha Stewart's website and since she's the queen of everything awesome I figured I couldn't go wrong. I don't have a springform pan thing, so I just used store bought crust and it worked just fine. I did find that I had extra of the filling and I didn't want to over flow it, so I just spread the left overs on some graham crackers and had that as a snack while I waited for the other one to set. YUM!!! I think I might make those for a party snack; have graham crackers with cheesecake spread on them and have little bowls full of toppings like caramel or cherry pie filling...om nom nom nom! Anywho, this cheesecake has more of a thick pudding consistency and I like those better than say a standard NY cheesecake, so I'm totally in love with it. I will definitely be making it again and trying different varieties of it. I think a strawberry cheesecake would be to die for!

Sunday, November 13, 2011

Frozen Peppermint Cheesecake

Ingredients:
2 cups chocolate wafer cookie or sandwich cookie crumbs
1/4 cup sugar
1/4 cup butter, melted
1 (8 oz.) package cream cheese, softened
1 (14 oz.) can Eagle Brand® Sweetened Condensed Milk
2 teaspoons peppermint extract
2 cups heavy cream, whipped
Red food coloring (optional)
Smucker's® Chocolate Fudge Spoonable Ice Cream Topping (optional)

Directions:
  1. LINE 9-inch round cake or springform pan with foil.
  2. COMBINE cookie crumbs and sugar in medium bowl. Add butter; mix well. Press 2 cups crumbs firmly onto bottom and partway up sides of prepared pan. Chill.
  3. BEAT cream cheese until fluffy in large bowl. Gradually add sweetened condensed milk until smooth. Stir in peppermint extract and food coloring, if desired; mix well. Fold in whipped cream. Pour filling into pan.
  4. COVER; freeze 6 hours or until firm. Garnish with fudge topping, if desired.


My Take
I got to make this recipe at my dad's house since they've got all the utensils to do it. Carol thought she had peppermint extract and didn't so we just used vanilla instead and added extra pieces of the crushed peppermint candy to get the peppermint flavor. We also didn't make the crust like the recipe calls for, we just used the pre-made Oreo crust and we didn't put the ice cream topping on either. Currently it's sitting in the freezer setting...I don't want to wait, I want to try it out now!! lol. So besides having the cheesecake part everywhere, I had no idea that you could make whip cream with just one ingredient. Good thing Carol was there to tell me I had to whip it first because I would have just poured the heavy cream into the bowl and then it wouldn't have been so fluffy. Then she showed me how to fold it in and go from there. The only downfall is it became less pink after that, so I'd add more food coloring next time (I only added four drops today).

The other thing is this recipe makes WAY too much for just one cheesecake so we had to make another mini one. It probably would have made an second one, but we didn't have another Oreo crust.


Saturday, November 12, 2011

Takes Two to Tango

Parmesan Roasted Potatoes
Ingredients:
4 medium potatoes, skins on, scrubbed and diced*
2-3 Tbsp olive oil
1/2c grated parmesan
1 tsp garlic salt
1/2 tsp paprika salt and pepper to taste

Directions: 
In a large bowl, toss potatoes with olive oil, parmesan, garlic salt, and paprika. Spread potatoes out on a large baking sheet. Bake at 425 degrees 30-40 minutes, stirring potatoes every 10-15 minutes for even browning. Sprinkle with salt and pepper to taste and serve warm. *The most important thing is to keep the potato pieces about the same size so they cook evenly. I like to slice the potatoes in half lengthwise, then slice each half lengthwise again, then dice. I end up with 16-20 pieces per potato. You can end up with more or fewer, just try to keep the pieces the same size.

My Take:
Well, I think that I cut my potatoes too big, or they were just too big to begin with because mine looked nothing like the perfect potatoes in her picture, but regardless they were delicious. I think next time I will mix the ingredients together BEFORE I put the potatoes in to coat them. Also I'll cut smaller pieces of potatoes and probably not use as many either. The recipe says to use four, but I only did three potatoes and they weren't coated with a lot of seasoning. So I think two potatoes would be just fine for two people and then they'd be more flavorful. I still have a ton left over so I've got dinner for tonight too!


Sauteed Garlic Broccoli
Ingredients:
8 oz Package Broccolini (aka baby broccoli)
2 Tablespoons Butter
2 Garlic Cloves, minced finely Salt & Pepper, to taste

Directions:
In a fry pan, melt butter and add garlic. Wash broccolini thoroughly, then add to the fry pan and coat in butter mixture and saute for 10 minutes on medium high heat, then lower heat and cover for another 10 minutes.

My Take:
First off I bough fresh broccoli, I didn't use a package of broccolini like the recipe calls for. So I just cut up 2 stalks of it and used it all. After put the broccoli I realized I didn't have a lid for my pan, and I don't own a pan with a lid, so like everything else I try and cook I decided to wing it lol. I eventually had to add some more butter because it had all cooked in or evaporated and even then I ended up taking the broccoli off before it was fully cooked. It was REALLY crunchy and I would have liked it to be a tad softer, but all in all it wasn't bad. The original recipe calls it "Sauteed Parmesan Garlic Butter Broccoli" but there wasn't anything in it about the parmesan so I just left it out all together. I'm sure I could have just tossed some in and it would be just fine.


Rice Crispy Treats
Ingredients:
3 tablespoons butter
4 cups mini marshmallows
6 cups Rice Krispies

Directions:
In large saucepan melt butter over low heat. Add marshmallows and stir until completely melted. Remove from heat. Add Rice Krispies and stir until well coated. Using buttered spatula press mixture into 13 x 9 x 2-inch pan coated with cooking spray. Cool. Cut into 2-inch squares. Best if served the same day. Makes 12 to 15 squares.

My Take:
I'm starting to think I can't follow a recipe to save my life hahaha. I didn't want to buy mini marshmallows because I had the GIANT ones at home, so I just used those. But after everything was finished the treats were a tad tough and we determined that it was because it took SO long to cook the big ones down that they kind of toughened up. So stick to the recipe and use the mini ones. Also, I used the 13 x 9 pan and they're only like a 1/2" thick so I would use a smaller pan if possible too. Other than that they taste pretty good.


*The main course for the dinner was store bought pulled pork, all I had to do was heat it up in a microwave.


Monday, November 7, 2011

Pumpkin Seeds Take 2: Other Variations


Taco Pumpkin Seeds
1 cup seeds from freshly cut pumpkin, washed and dried
2 tablespoons vegetable oil
1 tablespoon taco seasoning mix
1/4 teaspoon garlic salt

In a skillet, saute pumpkin seeds in oil for 5 minutes or until lightly browned. Using a slotted spoon, transfer seeds to an ungreased 15-in. x 10-in. x 1-in. baking pan. Sprinkle with taco seasoning and garlic salt; stir to coat. Spread into a single layer. Bake at 325 degrees F for 15-20 minutes or until crisp. Remove to paper towels to cool completely. Store in an airtight container for up to 3 weeks.


Lawry's Seasoned Pumpkin Seeds
1 cup raw whole pumpkin seeds
2 teaspoons butter, melted
1/4 Lawry's Seasoned Salt

Preheat oven to 300 degrees F (150 degrees C). Toss seeds in a bowl with the melted butter and salt. Spread the seeds in a single layer on a baking sheet and bake for about 45 minutes or until golden brown; 
stir occasionally. 


Parmesan Garlic Pumpkin Seeds
1 cup raw whole pumpkin seeds
2 teaspoons butter, melted
1/4 garlic salt
Parmesan cheese

Preheat oven to 300 degrees F (150 degrees C). Toss seeds in a bowl with the melted butter and salt. Spread the seeds in a single layer on a baking sheet, sprinkle with Parmesan cheese and bake for about 45 minutes or until golden brown; stir occasionally.


Sweet Pumpkin Seeds
2 cups raw whole pumpkin seeds
2 tablespoons butter, melted
1/2 cup white sugar, divided
1 tablespoon ground cinnamon, divided
  1. Remove all the pulp and strings from the pumpkin seeds, then wash and thoroughly dry the seeds. 
  2. Preheat oven to 350 degrees F (175 degrees C). Line a baking sheet with parchment paper. 
  3. Place the melted butter in a bowl, toss the seeds in the butter to coat, and pour them onto the prepared baking sheet. Sprinkle about 2 tablespoons of sugar and 1 teaspoon cinnamon over the seeds, stir the seeds around to mix the coating, and spread them into a single layer. Bake the seeds in the preheated oven for 5 minutes. 
  4. Remove the seeds from the oven, and sprinkle them with another coating of 2 tablespoons sugar and 1 teaspoon cinnamon, mixing the seeds together and spreading them out as before. Bake 5 more minutes. Repeat the coating and baking step one more time, and bake the seeds for 5 more minutes. 
  5. Sprinkle the seeds with the remaining 2 tablespoons of sugar, mix, and bake the sugar coating onto the seeds, about 10 more minutes. Let the seeds cool on the baking sheet before eating.

So I once again didn't really follow any of the directions and I just cooked them like I did the original butter garlic ones. Then I just left the different versions in for different amounts of time according to their recipe. For the taco ones, I didn't saute them before I put them in the oven like it says to do. I just mixed the vegetable oil, taco seasoning, and garlic salt all together then mixed that evenly over the seeds and popped them in the over. For the sweet pumpkin seeds, I mixed the butter (only 1 tbsp) with the seeds then sprinkled the cinnamon and sugar (1 tbsp sugar - 1/2 tsp cinnamon) over that and stirred; then placed them in the oven. I did take them out after 10 minutes and added another tablespoon of sugar and another half teaspoon of cinnamon and let that bake for about 20 minutes. Took them out and stirred them because they were stuck together and put them back in for another five minutes. Out of all of them I think the Lawry's and the cinnamon/sugar ones were my favorite.


Sunday, October 30, 2011

Deutscher Schokoladenbrauner Kuchen

Hallo!!

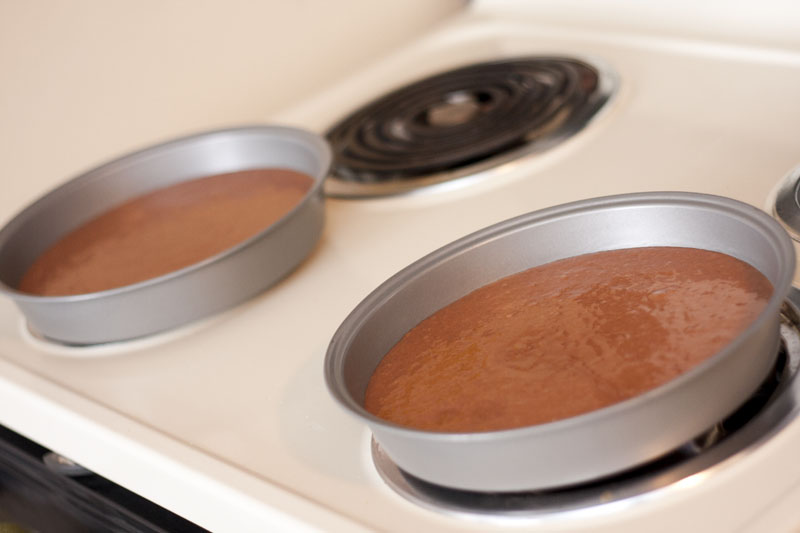
German chocolate cake!!! I had some eggs that I needed to use up and decided to try my hand at making a cake. My friend had left their cake pans here so I commandeered them! It was just a Betty Crocker box cake and frosting so I figured I couldn't mess it up too bad and set to work. I just followed the instructions on the box and waited for it to finish baking. What I didn't anticipate for is getting the cake out of the pan...I've never done that and had no idea how to do it without ruining the cake. So I just shook it a bit until the cake loosened itself and all was good in the world of cake again :) Also, what Betty Crocker doesn't tell you is how much frosting you need. I used two 9" cake pans and only bought one thing of frosting and that would have been fine if I didn't want to frost the sides of the cake, so I had to run to the store and buy a second can to finish the job. As far as I can tell everything turned out just fine, but I'll know tomorrow when I take it to my dad's house for the true taste test :)


Friday, October 28, 2011

Earth Worm Pie

2 Oreo Cookie pie crusts
5.9oz package chocolate pudding
Gummy worms

Take one of the pie crusts and crush it up, you can also do this with regular Oreo cookies, but i didn't want the temptation of a package of Oreos around :) Put a few gummy worms in the bottom of the other pie crust. Make the pudding according to the package then pour in pie crust with the gummy worms. Sprinkle the crumbled one on top of the pudding to make a top crust and then push a few worms into it to make it look like they're crawling around in dirt.

This was seriously one of the easiest things I've created!! I didn't follow a recipe, I just knew what it looked like and winged it. I ran into my friend Amy at the store suggested using two Oreo pie crusts and crumbling one rather than actual Oreos, which was probably better because I don't have a chopper and I think the filling would just make things weird. The crust is just the cookie part so it crumbles really easily and looks perfect!! I was stressing out about what to make for my friend's Halloween party, I wanted something festive, but not too gross looking at the same time so this was perfect! I'm really happy with how it came out and I had a little left over so I made a mini one that I could try after dinner so I knew how it would taste before tomorrow. It was tasty!! I adore gummy worms though so that might be why lol.


Tuesday, October 11, 2011

Cake in a Cup


Ingredients
4 tablespoons self-rising flour
4 tablespoons sugar
1 egg
3 tablespoons cocoa powder
3 tablespoons Nutella
3 tablespoons milk
3 tablespoons vegetable oil
Whipped Cream Topping (if desired)
½ cup heavy cream
1 tablespoon sugar
Directions
Combine all ingredients in a large coffee mug. Whisk well with a fork until smooth. Microwave on high for 1½– 3 minutes. (Time depends on microwave; mine took 1½ minutes.)
Add heavy cream to the bowl of a stand mixer fitted with a whisk attachment and whip on medium-high speed until almost stiff. Add sugar and beat until heavy cream forms stiff peaks. Top Mug Cakes with whipped cream and a little chocolate sauce, if desired.

The Cake in a Cup is probably one of the most ingenious inventions I've ever had the privileged of eating. It was so yummy and perfect to tame the I need cake right now! craving that comes on every now and then. Plus, I didn't have to buy an entire cake and then have the burden of not only eating it all, but also thinking about all the calories I just ate lol. So this is a great alternative.

Now because I'm full of all kinds of talent, I managed to get egg on my pants while trying to crack the stupid thing. Everything went off without a hitch other than that, but as you see, the directions say to cook it for 1½– 3 minutes, but my microwave must cook cold or whatever so I had to cook it for about 4 minutes. I took it out and was eating it the first time and got down to the bottom and it wasn't quite cooked all the way through, so I just popped it back in the microwave and finished. I think if I had known that it wasn't cooked all the way, the puff on the top wouldn't have fallen down (check out the pic). It probably would have been like a mushroom ballooning out of the top of the cup, but it's all good and everything tasted great and that's all that matters.


I also didn't make the whip cream to put on top, just because I thought it would be a little much to have at one setting between that and dinner. I didn't even finish the entire cake as it is, so I'm sure with that I would be exploding with food lol.

Thursday, October 6, 2011

Pretzel Jell-O


2 1/2 cup crushed pretzel
3 Tbsp. sugar
3/4 cup butter (oleo or margarine will work as well)

1 (8oz) pkg. cream cheese
1 cup sugar
1 (8oz) container Cool Whip
1 (6oz) pkg Strawberry Jello-O
2 cup boiling water
1 (16oz) pkg frozen strawberries (sliced if you can find them)

Combine crushed pretzels w/ sugar and melted butter. Press into 9x13 inch pan. Bake at 350 for 10 minutes. Remove from oven and cool COMPLETELY (very important!)

Blend cream cheese, sugar, and Cool Whip together. Spread on top of crust. Combine water with jello until dissolved. Add frozen strawberries and stir until almost set. Pour mixture
 over cream cheese and put in refrigerator until set (overnight).

Let me start out by saying that this is my very first attempt at making a dessert that isn't a s'more, so I knew from the get go that this was going to be interesting. I wrote down all the things I needed to buy, which included measuring utensils and a whisk, since I didn't have either of those things, and headed out to the store. I have to say that I had anticipated spending a LOT more than I did, but I got out of there paying EXACTLY $14!! That's the ingredients and utensils (I didn't even have sugar...that's the fun part about starting completely new in a house, you've got nothing).
As you can see the recipe calls for a 9x13 inch pan. I don't have one of those and figured I could use my pie dish, but I haven't learned how to split a recipe yet (math, also not one of my strong points) so I just made the whole thing. I definitely had some left over and had a little Pyrex dish and just made a small size, big enough for two people as well. Now there are a couple things that I would have done different. First of all as you can see by the two photos below the top one is the one I made in the pie pan and the second one is the one I made in the smaller dish. The next time I make this I will use a Glass Footed Trifle Bowl because I had an issue with the Jell-O spilling over the edge in the pie dish. Also when it spilled over, it leaked into the pretzel layer and they got a tad soggy. But with the taller bowl you can make it in layers so the whip cream/cream cheese/sugar layer will act as a seal against the Jell-O.
The other thing I'd do differently is buy a had mixer and a chopper. Crushing up the pretzels by hand took forever and would have been much better with one of those chopper things. But I think the hardest part of the prep was mixing the whip cream layer with a whisk. It ended up being a tad lumpy. A friend of mine let me whip the left-overs in her mixer and it helped tremendously, so that's definitely an investment I need to make in the future. Other than those two issues everything else was good and it tasted awesome too!! 


Recipe from my derby friend: Jenn O. Cide